Best BJJ Mobility Drills in 2024
Mobility is something often neglected when training BJJ. It is one of those things that is always overlooked, but when done right, it changes everything. If you’re someone who feels like they’re having a hard time adapting to BJJ submissions (kimura, triangle chokes, etc.), then this is for you. To be frank, whether you’re a white belt or purple belt, you still need to work on your mobility because it will protect you from any injuries and it will allow you to tap less often.
What Is Mobility?
Mobility is about strength and control, the more control you have the stronger you will become. When you train mobility, you can strengthen the smaller muscles that connect your joints that are very hard to target when you’re doing your strength and conditioning or BJJ.
There’s a common misuse of the word mobilization and mobility: mobilization is moving a joint to restore normal joint mechanics. Mobility is the ability to move a joint actively through a range of motion or being strong enough to control the joint during that movement.
To train joints ROM, they need to be isolated and mobilized with purpose. Doing that allows your whole body to move better connecting everything. Sometimes small details like that are unintentionally left behind in training whether in BJJ or strength training. Strength and mobility always go hand in hand.
Keep in mind mobility is not the same as flexibility. Flexibility stretches the muscles, while mobility helps clear out any active movement restrictions.
Joints to Focus on For Mobility
The human body is complex, and it does not like when we force it to do something it’s not prepared to do when we do, it breaks down. This is why we will guide you step by step into your mobility potential by outlining the areas you should focus on.
Here’s a non-exhaustive list of the areas you should focus on for BJJ:
- Shoulders & Neck – The shoulder and neck are very sensitive joints. This is since the neck allows through all the nerves that diverge to the rest of the body. Some neck injuries even radiate to the shoulder. Because these joints are very compacted and complex, having full ROM is a prerequisite to start any kind of BJJ training.
- Wrists – Your wrists are the beginning of everything in BJJ because they allow you to grab your opponent, pummel with them and take them down. They tend to get overused and any limitation in wrist ROM or pain can be very frustrating.
- Thoracic Spine – Rotation and flexion during Jiu-Jitsu are a daily thing, allowing the trunk to move in its full range of motion is a must for BJJ athletes. It’s a full-contact sport, every part of your body matters.
- Hips – Hips are the most important joint when it comes to BJJ because it ties everything together from guard game to guard passing, you name it. Jiu-Jitsu athletes use their hips a lot and as a result, the joint gets tight. Stretching is only half of the work, mobility is the other half that will increase your hip flexibility.
- Knees – This is probably the number one joint that scares a lot of BJJ athletes, because in the heat of the moment, with any leg attack the knees could get hurt. Making sure your knees are flexible enough will allow you to last longer on the mats without any knee injuries occurring down the line.
- Ankle – The ankle joint is a target for a lot of BJJ athletes (leg lockers and ankle lockers etc.). It tends to get sprain a lot, which causes further problems in the hip and knee joint because the human body moves through a kinetic chain. Taking care of any mobility restrictions in the ankle will prevent any injuries and allow you to train safely even when put in awkward ankle submissions.
The Best Mobility Exercises for BJJ
Here’s the list of the best mobility exercises I’ve acquired from physiotherapists.
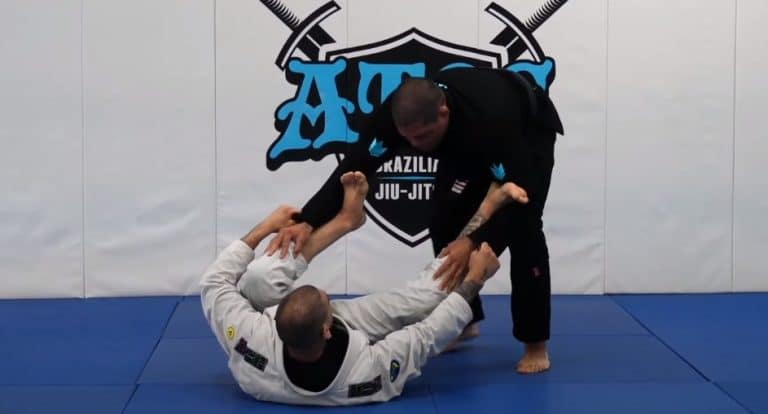
Neck Flexion and Rotation Mobilization
For this section, we have 3 mobilization techniques, all you need is a strap/towel/BJJ belt. The following techniques should be done in a pain-free range of motion. You should only feel a stretch, nothing more.
Flexion Hold – 6×3 seconds hold
- Position the belt bony part in the upper neck region
- Pull down and hold
Neutral Position Hold – 6×3 seconds hold
- Position the belt the same way as before
- Keep the neck straight
- Pull down resisting flexion of the neck
Extension Position Hold – 6×3 seconds hold
- Start with the belt in the same position as previously
- Move your chin forward
Rotation Hold – 6×3 secs each side
- Same starting position as the previous drill
- For rotation to the right hold on to the left side of the belt with your right hand
- Pull the other side of the belt down with your left hand
- Actively rotate your head to the right
- Pull your head further to the right with your right hand and hold it there
- Repeat the same for left rotation, just switch your hands
Shoulders
Shoulder CAR (standing) – 3×10 each arm
Shoulder Controlled Articular Rotations are deliberate slow movements to help with the control component we mentioned earlier. If you stick with these for a few months, we guarantee you, the difference in mobility, flexibility, and even strength in your shoulder will be noticeable. A tip performs it correctly: “imagine the air getting thicker as you circle your arms”.
- Start in the standing position with feet firmly planted
- Close your fist and tighten the core
- Externally rotate the targeted shoulder
- Lift the palm while raising your arms overhead as slow as possible
- Feel the engagement of the lower chest
- When the arm reaches ear level, the palm should face the side of the head
- Do not: rotate your upper body, shrug up your shoulder, bend at the elbow
- Turn the palm facing the other side
- Continue rotating the arm behind you (as if you’re trying to hide your hands)
- Direct your thumb back behind you as you lift again: you should feel the first stretch at the shoulder
- Midway through your circle externally rotate your shoulder to continue moving your arm up towards the ceiling
- Finally, lower your arm to the starting position
Shoulder Mobilization Drill 3×5-10 pulls
This a gold exercise to address any painful grinding or popping of the shoulder when you’re on the mats. To perform it, you will need a resistance band anchored in something sturdy next to the targeted arm.
Focus on putting your shoulder in the right position: you want the shoulder joint to be at its loosest (weakest position). You should have the least amount of ligament tension. You need to do this drill 3-4 times a week for it to pay dividends.
- Begin by lying on your back
- Pass your arm through the band: just above the biceps
- The arm should be about 60 degrees away from your body and about 30 degrees up off the ground.
- Slide further away from the anchor point, against the tension of the band
- Reach across with the opposite arm and grab the loose arm from the wrist
- Roll a little further with your body as you pull the loose arm
- Go back to the starting position
Wrist
The wrist is involved in mainly 4 movements: flexion, extension, pronation, and supination. The flexors muscles tend to get tight due to the gripping movements repeated in BJJ.
Working on the wrist mobility drills will be done in 4 parts:
Wrist extension – 3×10-15 reps each direction
- Start with the tabletop position
- Palms on the floor with wrists in extension
- Rock back and forth to mobilize the joint (that’s one rep)
- Repeat the same movement but with the palm facing outwards: this will place a great stretch on the forearm flexors
Wrist Flexion – 3×10-15 reps
- Starting with the same position as the previous drill
- Place the back of your hands on the floor
- Rock back and forth (that’s one rep)
- Go by feel and never push through pain: you should only feel mild discomfort
Wrist extension with palms facing each other – 3×10-15 reps
- With the same starting position as the previous drill
- Place your palms so that they face each other
- Start rocking side to side to hit the required mobility
Rotated Wrists – 3×10-15 reps
- Place your palms out this time by rotating them 180 degrees (or as much as you can without pain)
- Start rocking back and forth to mobilize the wrist
Spine
Upper Spine Mobilization
This is a comprehensive drill divided into 5 parts each one is done for 10-15 reps. All you need is a resistance band, a bench/chair, and floor space. The purpose stays the same, control and quality movement. Working on thoracic movements: flexion/extension, rotation/extension, full rotation, assisted thoracic rotation, and finally reverse tabletop rotations.
Assisted Thoracic Flexion/Extension – 2×10-15 reps
- To start place both hands behind your neck
- Kneel on the ground
- Place your elbows on the bench/chair
- Lean back as much as possible: this place the stretch on your lats
- Push down back on the chair flexing the spine as much as possible (that’s one rep)
- The chair has to be at least at chest level or higher
Kneeling Thoracic Extension/Rotation – 2×10-15 reps each side
- Same starting position as the previous drill except without a chair
- Same kneeling position
- Point your chest up, extending your thoracic spine
- Keep the hips touching your ankles
- Rotate left and right with chest up (that’s one rep)
Side-Lying Thoracic Rotation – 2×10-15 reps each side
- Start in a side-lying position
- The top leg crosses in front of the leg on the floor: this will place a stretch on the lower back
- Extend the arm on the floor in front of you
- Start by slowly rotating to the opposite side
- Extend the other arm almost behind you then bring it back on top of the bottom arm (that’s one rep)
Assisted Thoracic Rotation – 2×10-15 reps each side
- Anchor a resistance band at shin level/knee level
- Start in the tabletop position: hips should be touching ankles
- Slide one arm through the resistance band
- Place that arm behind your neck
- Let it slowly pull your upper thoracic spine to 90 degrees
- Pull back and rotate until your elbow touches the opposite hand
Reverse Thoracic Tabletop rotations – 2×10-15 reps each side
- Start in a reverse tabletop position
- Raise one arm while extending hips: this is a full-body movement
- Let the arm lower while allowing your upper body to rotate: think of trying to make your chest face the floor
- Rotate back up to starting position (that’s one rep)
Bird Dog Row – 2×10-15 reps each side
This exercise will improve thoracic mobility and help mitigate any lower back pain that occurs from BJJ practice. The constant rotation of the lower body could be a cause of lower back pain to some. Bird Dog Rows teach your spine to resist rotation movements, reducing the strain that occurs to the lower back and hips. All you need is a light dumbbell or kettlebell
- Start in tabletop position: do not allow shifting of the hips
- You could put a foam roller or do it next to a door frame to avoid shifting hips
- Extend the hip back
- Do not overextend the hip just kick the leg back and locked out
- Use the arm opposite to the extended hip to grab the weight
- Slowly row up with the weight without letting the elbow go past your back
- Keeping core tight perform the row with the hip extension for 10-15 reps on each side
Hip Mobilization
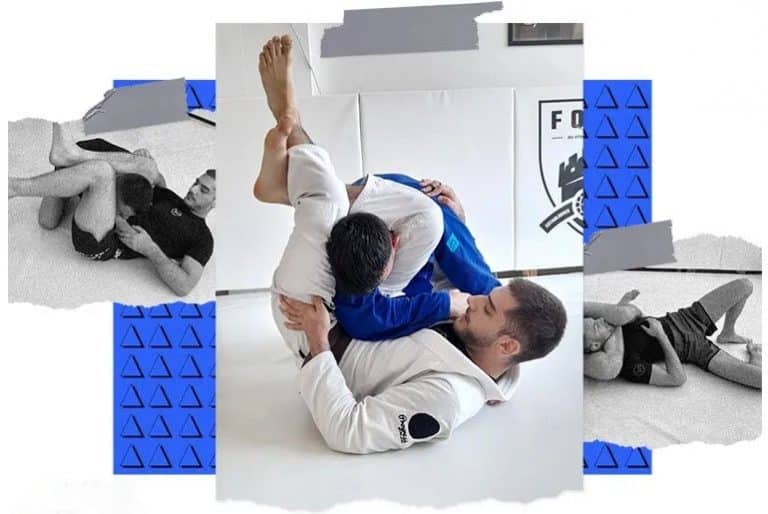
Mobility in the hips is crucial for BJJ. There’s no substitute for hard work when it comes to learning techniques, but a lot of times mobility of the hips is neglected. This could hold you back from learning specific techniques (rubber guard, triangle chokes, etc.) simply because your body doesn’t have enough mobility. This section will focus on hip mobility going through various ranges of motions, among tips to preserve your hip mobility for BJJ.
Box Hip flexors Stretch – 2x 30-60 secs each side
This hip flexor stretch will help clear some room in the hip joint for the next drill. Even though it’s a mobility routine, we include static stretching to help you ease into the mobility drills. If you lack hip flexibility and want to increase it for BJJ, you can add an extra 2 sets of these.
- Block the rear ankle with something heavy (box, book, kettlebell, etc.)
- Bring the rear knee inside the ankle: this will stretch the outside of the hip as well
- We’re going for internal rotation and hip extension
90/90 Hips – 3x 10-15 reps
The 90/90 hip drill will improve your hip mobility for BJJ, just make sure you don’t rush through it and go as slow as possible. By working on this movement, you will improve your performance on the mats and avoid any groin strains.
- The lead knee pointing in a 90° direction
- The rear knee pointed in the opposite direction at 90°
- Keep heels on the ground
- Rotate to the opposite side (behind you)
- Lift one leg and let the other leg follow
Tactical Frog Drill
The tactical frog drill helps teach the body to coordinate the pelvic movement while keeping the lumbar spine stable. Pelvis and Hip movement are the bread and butter of every BJJ athlete. It’s a great way to loosen the hips. You can alter the stretch to focus more on the muscle you want to stretch more based on your mobility needs. This drill is divided into 3 parts:
Part 1: Tactical Frog Depth – 2×10-15 reps
This will help you gauge how deep you can go into hip flexion without flexing back. It will also teach the body to stay in hip flexion while keeping the lower back neutral.
- Start in the tabletop position
- Spread the knees wide: the distance between them should be the same as when you perform a bodyweight squat
- Toes in line with knees
- Rock back and forth
- When you feel your butt tucking, extend the lower back to keep it in a neutral position
- Brace your core (as if getting punched)
Part 2: Tactical Frog Side to Side – 2×30-60 secs each side
To get more flexible hips, we change the positioning of one leg to allow more hamstrings stretch. The hip joint is surrounded by multiple muscles (hip flexors, adductors, abductors, hamstrings, psoas, etc.) mobilizing the joint should be varied to get the best out of those drills.
- Same starting position
- Extend one leg to the side
- Rock back and forth without tucking your butt/flexing back
- Allow the extended leg’s toe to come off the ground: This will also improve hamstring flexibility
- On the hands or the elbows to see where you get the best stretch without flexing the lower back
Part 3: Tactical Frog Tibia Lift – 2×10-15 reps each side
This tactical frog helps with hip internal rotation, clearing out more space. Make sure again your lower back doesn’t round.
- Same starting position as the first drill in this sequence
- This time with forearms on the ground
- Lift the side of one foot towards the ceiling as you bring the hip correspondent hip to touch the ground
- It’s okay if your upper body shift a bit to the side
Sacroiliac Joint Mobilization
The SI joint looks kind of like two fists going together: It should not move more than a couple of millimetres because it absorbs most of the stress coming from the upper body and the lower body. Most SI joint pain comes from too much movement due to a lack of hip mobility. You could do some soft tissue work before those drills on the SI joint, to help ease into them. Here we go through this mobilization technique to improve hip mobility.
Figure 4 stretch – 2×60 secs each leg
- Start by lying on your back
- Feet up on a wall
- Cross one leg on top of the other
- Let the extended leg fall until you form a figure-4 with legs
- Push on the crossed leg: do not move your pelvis up! Keep your butt on the floor.
Knee
The knee is indeed a hinge joint but some degree of rotation is allowed: during knee flexion and extension some rotation occurs. For example, during non–weight-bearing active knee extension with the tibia moving on the femur, the tibia laterally rotates during the last
10 to 15 degrees of extension to lock the knee.
Here are 4 mobility drills to work on knee mobility:
The Ski Move – 3×10-15 reps
- Start in the standing position with arms at the side
- Bend slightly at the knees
- Keep feet planted and swing both arms to the side as knees swing in the opposite direction
- For each swing exhale
- You could add a circle with the arms to add a little shoulder mobility as well
Knee Rolls – 3×10-15 rolls in each direction
This drill is a classic warm exercise, it also fits in as a mobility drill. If you ever played, soccer or basketball as a kid, you’re probably familiar with it.
- Start with feet shoulder-width apart
- Slight bend at the knees
- Place hands on knees and roll the knees inward for 15 rolls in each direction
- Repeat the same motion for the opposite direction for 15 rolls
Inside and Outside Leg Pummelling – 3×10-15 reps each direction
This drill is simulating a fight with someone trying to pass your guard. This is a rotational movement with the tibia and knee because like we said, knees can still rotate.
- Start by lying on your back
- Feet in the air
- Pummel 15 reps to the inside
- Repeat the same for the opposite direction
Rocking Chair – 3×15 reps each leg
This exercise is a full-body drill that focuses on knee support. This is a classic BJJ warm-up drill that will not only improve your knee mobility but also your BJJ performance.
- Start in the sitting position
- Rock back and let the momentum bring you up
- As you come up the rear knee internally rotates: the tibia moves like a windshield wiper
- The lead knee lunges forward for support
- You can put your hand on the floor for support
Ankle
Ankle mobility is not only for squatting but for overall proper joint mechanics. Improper ankle joint mechanics can cause problems up to the knee and hip. The emphasis will be on lifters who are recreational BJJ athletes: it could affect your technique and overall performance in the weight room. You will need a resistance band for this technique and a place to anchor it.
Ankle Dorsiflexion – 3×8-10 reps each leg
You will notice that after a couple of reps with this, you will feel more freedom of motion while keeping the ankle on the ground.
- Start in a lunging position
- Put the targeted ankle inside the resistance band
- The band should be around the back of the tibia: about 2-3 inches above the ankles
- The band will pull the tibia forward: all you have to do is let the band pull you forward as you lunge
Another way to do it could be by:
- placing the band on below the ankle joint: this will pull your feet backward and you will have to resist the band’s pull by lunging forward.
- With the other rear foot stepping on the band to increase tension as you dorsiflex.
Structuring The Routine
There are 27 exercises in the routine. So we suggest you split it into two days. You can simply split the exercises into upper body and lower body days. Here’s an example:
Day 1:
Neck
- Neck Flexion/Neutral/Extension/Rotation Holds – 6×3 sec hold each direction
Shoulders
- Shoulder CAR (standing) – 3×10 each arm
- Shoulder Mobilization Drill – 3×5-10 pulls
Wrists
- Wrist Flexion/Extension/Rotation – 3×10-15 reps
Spine
- Assisted Thoracic Flexion/Extension/Rotation – 2×10-15 reps each direction
- Bird Dog Row – 2×10-15 reps each
Day 2:
Hips
- Box Hip Flexor Stretch – 2x 30-60 secs each side
- 90/90 Hips – 3x 10-15 reps
- Tactical Frog Drill (3 drills)
- Figure 4 stretch – 2×60 secs each leg
Knees
- The Ski Move – 3×10-15 reps
- Knee Rolls – 3×10-15 rolls in each direction
- Inside and Outside Leg Pummelling – 3×10-15 reps each direction
- Rocking Chair – 3×15 reps each leg
Ankle
- Ankle Dorsiflexion – 3×8-10 reps each leg
FAQ
How often should I do those drills?
You should work on these at least 2-3 times a week, during your OFF days if you prefer. Some of these drills need patience and repetition for them to pay off in the long run.
When should I do them?
You could do them pre- or post-BJJ practice if you have access to the equipment.
What equipment do I need?
To perform the following drills you will need a resistance band, a belt (use your BJJ belt if you can), a kettlebell (or something heavy like a book). You need some floor space with a wall and a pole or any sturdy close by (couch, fixed desk, etc.)
I’m not naturally supple, will it work for me?
Of course! Mobility and flexibility are always something you can work on to improve. Granted, some people have an easier time developing mobility but in all honesty, every BJJ athlete needs to work on their mobility regardless of their level.
References
- Levangie, PK, and Norkin, CC: Joint Structure and Function: A Comprehensive Analysis, ed 4. FA Davis, Philadelphia, 2005.
- Williams, PL (ed): Gray’s Anatomy, ed 38. Churchill Livingstone, New York, 1995.